Using DroneCI to Build mkDocs on a Raspberry Pi 4
My home computer setup is way more complicated then the average household. I use Unraid on my R720XD, OPNsense on a HP T620+ thin client, PiHole on a RaspberryPi 4, DietPi 0n another Raspberry Pi 4, among a few other odds and ends to run just the backbone of my house.
When you mix all of this together, it becomes a hassle to remember how you do everything. For that reason, documentation is a must. I have tried many documentation solutions like Trillium, MediaWiki, WikiJS, and a couple of others. But ultimately, I decided on mkDocs. MkDocs is easy to use and format using markdown. I personally use Material for mkDocs. It builds a lot of useful features in to mkDocs and is aesthetically pleasing.
It gets a little complicated for me though. I don’t want everything out in the open on Github. I want everything for my home documentation that includes the structure of my network, passwords, and other personal info to stay on my network.
In this article, I am going to be using a Raspberry Pi 4 loaded with DietPi to be the host of a Gitea server, Docker, and Lighttpd to host the documentation for my homelab.
MkDocs is a fast and simple static site generator that’s geared towards building project documentation. Documentation source files are written in Markdown, and configured with a single YAML configuration file. The source files are then built to static HTML files that can be hosted on a file server or even Github Pages.
DietPi is a very light weight operating system based on Debian that is optimized for single board computers such as a Raspberry Pi. The UI is command line based but very easy to do. It also handles all of the installation and configuration of a pretty big list of applications. The applications we are going to use are Gitea, Docker which we will use for Drone, and Lighttpd.
Gitea is a light weight, very fast, self hosted, and open source alternative to Github. This handles automatic backups of configurations for Home Assistant and Unraid. It also is what I use to upload my documentation so that I can work on it from any computer in my house.
Lighttpd is what we are going to use to serve the built mkDocs files. While I am using Lighttpd, there are also options for Apache and NGINX baked in to DietPi, and any of them will work, Lighttpd is the most light weight. You can use any of the database servers, but I would use MariaDB for the most compatible, or PostgreSQL for light weight. We won’t be actually using them though but you have to install one (at least as of Oct 2021) to install a file server.
Docker uses OS-level virtualization to deliver software in packages called containers. I am going to use Docker to run Drone and a runner (what Drone uses to execute tasks.)
Drone is a continuous delivery system built on container technology that uses a simple YAML build file to define and execute build pipelines inside Docker containers. I will be using Drone to automatically detect changes to the documentation when pushed to Gitea, build the documentation to static HTML files, and then copy the HTML files to the correct directory to be accessible from within my network.
Pre-requisites
This isn’t going to be a full install guide on how to install Python, mkDocs, DietPi, etc. I will update this article as I make guides for the items needed.
Up to this point, you will need the following:
- DietPi installed
- Gitea installed and configured (dietpi-software install 165)
- Docker installed (dietpi-software install 162)
- Docker Compose installed (dietpi-software install 134)
- Lighthttpd (or your preferred web server) installed (dietpi-software install 84)
Overview
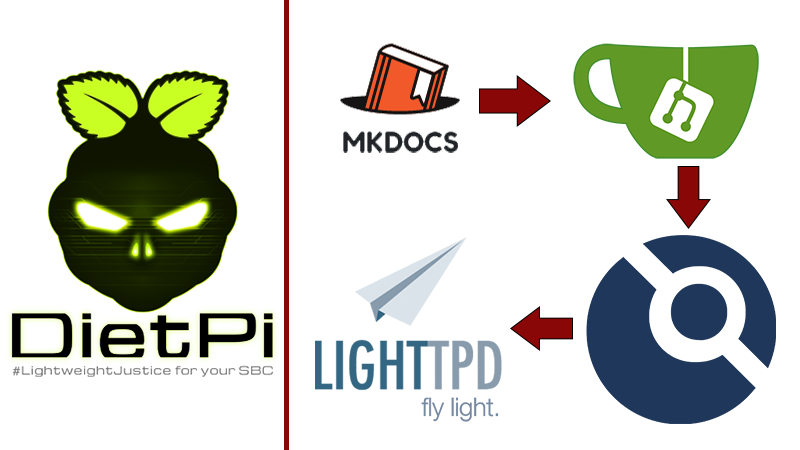
My setup might be a little different than everyone elses. I have mkDocs installed on each of my computers and the files on my NAS so that I can keep them in sync no matter what computer I am using. When I make edits, I then push the updated docs to my private Gitea server for Drone to build the docs and then push them to Lighttpd to become live within my network. This way, I can access the documentation while I am on my home network or while VPNed in to my network.
I am running everything on a RaspberryPi 4 so for my instance, I will be running ARM images of everything.
Setup
Preparations
Before we get started with the good stuff. We need to prepare some things. We will need the following:
- Our Gitea URL
- The URL that you will access Drone with
- A Gitea OAuth2 client and secret
- A randomly generated RPC secret
- mkDocs set up as a git repository
Gitea OAuth2
While in Gitea, click on your profile in the upper right corner > Settings > Applications. On the last section of the page, you should see a section called “Manage OAuth2 Applications”. Enter in any application name (I made mine “Drone”) and for the Redirect URI, enter in your full Gitea URL followed by /login. In my case, it would be “http://gitea.sudo/login“. Finally, click on “Create Application”.
On the next screen, you will be presented with a Client ID and Client Secret. You will need both of these. Make sure you do not close this page before moving the client secret to a safe place because this will be the only time you will be able to see it. If you do, you can regenerate a new client secret but you will have to update any instances that you currently running.
RPC Secret
The RPC secret is used to let any Drone runners to talk with the Drone server. This can be any random string. If you have a password generator, you can use that to generate an alpha-numeric string, or you can use a terminal on a system with openssl installed to generate a key with openssl rand -hex 16.
Drone CI
While DietPi does not have native integration for Drone, we can leverage Docker to setup Drone and a runner. Here is my docker-compose file:
version: "2"
services:

  drone-server:
    image: drone/drone
    container_name: drone-server
    ports:
      - 3001:80
    environment:
      - DRONE_GITEA_SERVER=http://url.to.gitea
      - DRONE_GIT_ALWAYS_AUTH=true
      - DRONE_GITEA_CLIENT_ID=clientIdFromGiteaOAuth2
      - DRONE_GITEA_CLIENT_SECRET=clientSecretFromGiteaOAuth2
      - DRONE_SERVER_HOST=droneURL
      - DRONE_SERVER_PROTO=http
      - DRONE_RPC_SECRET=droneRPCSecret
      - DRONE_USER_CREATE=username:admin,admin:true
    restart: unless-stopped
    networks:
      - drone

  drone-runner:
    image: drone/drone-runner-docker
    container_name: drone-runner
    depends_on:
      - drone-server
    volumes:
      - /var/run/docker.sock:/var/run/docker.sock
    environment:
      - DRONE_RPC_PROTO=http
      - DRONE_RPC_HOST=droneURL
      - DRONE_RPC_SECRET=droneRPCSecret
      - DRONE_RUNNER_CAPACITY=2
      - DRONE_RUNNER_NAME=runner1
    restart: unless-stopped
    networks:
      - drone

networks:
  drone:
    external: true
There are a few things above that need to be changed before you can run the compose file:
- DRONE_GITEA_SERVER needs to be changed to the URL you use to access Gitea. (ex: http://gitea.example.com)
- DRONE_GITEA_CLIENT_ID is where you will put the “Client ID” that you generated for the Gitea OAuth2 application.
- DRONE_GITEA_CLIENT_SECRET is where you will put the “Client Secret” that you generated for the Gitea OAuth2 application.
- DRONE_SERVER_HOST from the top section and DRONE_RPC_HOST in the bottom section should be your Drone url without the “http(s)://”. (ex: drone.example.com)
- DRONE_RPC_SECRET in both sections. This is what was generated with the password manager or openssl rand -hex 16 (ex: ddc8524b93efd8a027448e333912c904)
With all of your info filled in, you can run your compose file. This will start Drone and a runner. You can access your Drone instance.
When you log in for the first time, you will be asked to authenticate your instance with Gitea. When you get to the main page of Drone, click the “SYNC” button in the upper right corner to make sure that you can see your repositories.
To activate your repository, click on it and then click “ACTIVATE REPOSITORY”. On the next screen, turn on the “Trusted” toggle. We will need this because we will be writing to the system.
Drone Pipeline
Now, we can add our pipeline to the mkDocs. In the base directory of your mkDocs folder (same folder as mkdocs.yml), create a file named “.drone.yml“. Edit this file with your favorite text editor to include the following:
---
kind: pipeline
type: docker
name: build-home-docs

platform:
  os: linux
  arch: arm64

steps:
- name: build-docs
  image: ghcr.io/afritzler/mkdocs-material:8.1.0 #ARM version of mkDocs
  pull: if-not-exists
  volumes:
  - name: site
    path: /drone/src/docs
  commands:
  - pip install -U -r ./requirements.txt
  - mkdocs build
  when:
    event: push
    branch: master

volumes:
- name: site
  host:
    path: /var/www/docs
Now, there are a couple of things to point out here. I am using everything on a Raspberry Pi 4 that uses an ARM architecture. For this reason, I needed to declare the platform as arm64 to pull the correct image. In the same note, the official image (squidfunk/mkdocs-material) is only built for amd64. Therefore, we have to use a container that is built for ARM. afritzler/mkdocs-material is an image that is the officially recommended image to be used for arm64 and armv7.
Please match the mkDocs version with the version that you are using. At the time of writing, I am currently using mkDocs 8.1.0. I have matched that in the image that Drone will download.
I have created a “requirements.txt” file in my setup to download all of the extensions that I use with mkDocs. I currently use mkdocs-macros and mkdocs-roamlinks plugins. My “requirements.txt” file looks like the following:
mkdocs-macros-plugin==0.6.0
mkdocs-roamlinks-plugin==0.1.3
I am also using lighttpd in DietPi as my web server. The default location on the system to serve files on the host system is “/var/www”. I changed the location that the files are generated to “/var/www/docs” so that they are accessible to example.com/docs. You can change the output location in the last line of the .drone.yml file.
Conclusion
Now, every time you push your docs to Gitea, Drone will automatically build them and deploy them to your webserver. This saves you the hassle of building them and moving them yourself.
If you have any questions or problems, leave a comment below and I will try to answer them when I am able to.